About the 8bit Alexmos Controller Board
REVIEW – HOW TO: CAME-7000/Came-7500/Came-7800 (they are the same) 3-Axis Brushless Gimbal Stabilizer system
Now come with 32bit controller. Like this page? Please consider a donation, click here!
To Buy Came-7000 or the Came-7500 or the Came-8000 click here.
UPDATED: 9/10/2014 11:16am (EST)
Added a test video by a customer with the Came-8000
Added video on how to use the new AutoTune option in the new Alexemos Software for 32-bit Controller board.
Added two videos: One of me changing the 8bit controller to 32bit and one of me balancing the Gh4 with 12-35mm on the gimbal.
I’ve now changed my Came-7000’s 8bit controller into the 32bit version, I’ve also recorded myself of my process, will have this unedited video available soon.
My current setup to be used with the Gimbal will be using the GH4 + 12-35mm F2.8 lens + cheap quick release plate (not recommended after a few trial runs) to total the weight to be around 2.6lbs.
I now use the Panasonic Gh4 camera with the Generic Speedbooster adapter and the Rokinon 14mm lens.
New accessories listed, our own profile created. – Still all for 8bit Alexmos controller board. Two pictures of 32bit controller board IMU locations added. 32bit Controller Board Came-7000 build and setup. Added Tony Vo’s PID settings for his 32bit Came-7000. Came-TV has provided me 3 PID profiles to be used with the new 32bit controller
For 32-bit Alexmos information: click here to read more.
(Disclaimer: The information provided here are to be used as reference to help you build your CAME-7000, I am not liable if you break or damage or burn yourself) 🙂
READ THIS FULL TEXT ON SOME INSTRUCTIONS ON BUIDLING YOUR OWN
I’ve created another profile for my Canon 70D with Rokinon 14mm lens, scroll down below to download.
PLEASE READ IT A FEW TIMES THE WHOLE THING BEFORE STARTING, ALL YOUR QUESTIONS ARE ANSWERED HERE.
NOTE: Came-7000 is now being sold with the 32-bit controller. If you have recently purchased your Came-7000 read this as reference and the tuning part may be similar but the profiles described here may not work for you. We will be able to help once we get our 32bit controller and being able to try it out.
NOTE: We have been told by many users on several Facebook groups that the 32bit controller is extremely difficult to set it right without it vibrates.
Review of the Came-7000 8bit gimbal:
For my test running with the Came-7000 8bit gimbal, see here:
For our fun video about evolution of Stabilizers:
For our current project: A Fan Film Teaser that included the usage of a gimbal, to watch the finished Episode 1, click here.
We recently was hired to do a series of videos for Confucius Institute of Cleveland State University, here’s one shot done using the 8bit gimbal and the Atlas Camera Support System.
Background:
In Jan 2014, I decided to venture into learning more about Brushless Gimbals after watching a few videos from MoVI systems and reading a lot from Cheeseycam.com, while finding several Kickstarter.com’s projects of people trying to get funds for their gimbal systems. I wanted something that isn’t expensive, as I noticed these gimbals people are trying to get funding for are a bit of over the top pricing once you realized the controller board they are using is exactly the same as the DIY versions.
After venturing into ebay.com and seeing several sellers, I tried one that is of $599 range already assembled gimbal system, sadly, this product is horrible, and it was horribly constructed that after a day usage, the thing felt apart, I can’t update the control board firmware as it is a hacked version, their customer service is almost non-existence and on top of it all, From Jan 27 till finally on March 18, that’s when I got my money back… Lesson learned. Avoid Goodluckbuy or Gadgetextreme buyer (same people).
So since I wanted to get into this technology, I found a few already assembled package for about $1440 and up on ebay and then I started to check out the quality of each built, I wanted something that will work and has a really good build that it can last a bit longer than just a day or a week or a month. While doing my research, I’ve been visiting several websites like Cheesycam.com, dslrvideoshooter.com, nofilmschool.com, phillipbloom.net, dslrfilmnoob.com and a few others.
I noticed there were a small advertisement banner from Came-TV and so I checked out their products: they got the Came-6000, the Came-5000 and finally the Came-7000. So, seeing that Came-7000 has a really sturdy build, and 1 year warranty, I started to check out youtube videos, I saw several videos about how to assemble the kit and how to balance, so on, and noticed there were several forums that provide help/support within the community for Came-7000.
Should I order it and assemble it myself or just by a done kit sold from someone on ebay in my state (yes, I would rather buy an already assembled kit from a vendor that is within my country than to having communication issues)?
I took the plunge and got the Came-7000. To my surprise, it arrived in 3 days! I felt like it was an order done via Amazon Prime. I was happy.
Building your Came-7000
Before you start putting your gimbal together, READ the technically written manual for the Alexmos board (unless your board said it is a 32bit controller board, then read that part of the information at same website linked above), especially on the pages starting with basic instructions to follow, that would give you an idea on how everything should work, just read and have an understanding. I followed the video below first to put the kit together, make sure to watch it first and then follow it, at one point later you will noticed he changed the look of his gimbal on the next video.
MAKE SURE to watch till the end so to use as reference point as well!
Here’s our finished made pic: (Canon 70D + Rokinon 14mm lens = total weight is 2.86669lbs or 1300.31g)

Our friend Tom Antos also got several pictures to share on his google drive. Once the gimbal is assembled, the next step to connect the Alexmos control board to the gimbal.
I followed the video below, NOTE: At one point of the video, the screw he used isn’t the same size as mine, improvise if need to.
Also for the IMU Sensor board wire to the controller board, MAKE SURE you have the white wire on the 4pins connected to the ground on BOTH side (so the end of one wire, the pin with the white paint/strip on it should connect to the GRND and the other end of the same colored white strip to as well GRND) by doing so, you will have ONE pin open on the IMU Sensor and 4 of the PINS on the controller board connected.
Look at the back of each the IMU Sensor and the Controller board for the GRND label. I believed his video was made for the previous controller board that the explaination on that particular area was a bit different. By paying attention to where to connect the white painted wire to (see pictures link above), it will make your life easier:
Emm @ Cheesycam.com put together his Came-7000 and he has this video to explain how to hide the wires.
After it is all done, you can try to plug the battery on it to test if it turns on, you should hear a few beeps and it will start acting up I just unplug it and move on the next step… if you don’t hear beeps when you turn it on, then something is wrong (wire wise).
Here’s the back of my Came-7000 controller board noticed where it said BTN? that’s where you can eventually connect a button to it so you can switch profiles with the push on the button. It has no pins, so you will have to solder pins to it or solder the wires to it directly. (I prefer using pins, I got a bunch from here: http://www.amazon.com/gp/product/B00FR19WQA/ref=oh_details_o01_s00_i01?ie=UTF8&psc=1

NOTE: the horizontal bar/tube that is used to attach the two handles to, make sure to attach the handles at the end of the tube, not as the way the video above described, so you can have more room for the camera to move even 360 degrees. See picture below for an example.

It took me about 3 hours to assemble it together the 8bit controller.
Balancing with the Camera+Lens+whatever you want to attach to the camera onto the gimbal for weight – NOT the additionl monitor on above the motors) Next: mount the camera to the gimbal, many people keep asking what sort of lens you need, the answer is SIMPLE: use a lens that provide you a wide angle (a prime or a wide angled lens – several suggested something from 11mm to 35mm) simple because you are using a stabilizing system and would need to be ‘close to the subject’, while using zoom lens are not suggested, you can, just may have problem maneuver it. Also, before buying a gimbal, find out what camera and lens you plan to use it with and stick with it, otherwise you will have to deal with balancing it every time and it can take a LONG time. Find out the TOTAL weight you plan to have on the gimbal, the Came-7000 can hold up to 6.6lbs (about 3kg), that means, in my example: My Canon 70D with battery is 1.7lbs + my Rokinon 14mm is 1.2lbs, my total would be 2.9lbs. (I can probably add the battery grip but I didn’t want to risk it).
NOTE: After a few times of taking the camera out and on, I’ve learned that having a quick release plate will help me tremendously so I went and got a light Arca typed quick release plate, see at end for accessories I brought for my gimbal.
PS: it didn’t work cause it was too big and I have yet to find one small enough (or thin enough) to fit.
Now, mount the camera/lens to your gimbal, make sure anything else you want on the camera is there and anything else shouldn’t be IS out. Take out the lens covers, since you need to balance the camera on the gimbal system, anything extra will throw it off. I used these videos as references, although it is NOT the same gimbal, the method of balancing is the same: Here’s one from our friend Emm of CheesyCam.com I started learning about gimbals thanks to Emm!
Then there are a few others.
or
or
You basically need to adjust the camera bracket (top and bottom part) and then the horizontal bar behind the camera (where ROLL is attached to), be VERY careful because you have the camera mounted, it can ‘slide’ and throw you off balance. Here’s a video how the camera should stay when it is balanced:
It took me about 45 minutes to get it balanced. When you got it all balanced out, tightens the screws! I kept forgetting to do so and every time I store it away on a Pelican 0340 cube case (btw, fits 100% snugged), it gets unbalanced and I have to ‘turn the screws again’… Learned! 3/28/2014: Today I just discovered these three videos from Youtube user TonyTypes. They are really good to understand how to balance a Gimbal. it’s in three parts, see below.
Software Tuning:
OK! You are ½ way there! The next step is software tuning. Before you do that, you need to make sure your computer (PC preferred) can communicate with the Alexmos controller board, so you first need to download the driver for your computer, then the Alexmos controller board’s firmware and the GUI software to run it.
You can find all the download at Alexmos website.
(NOTE: a new 32-bit board just came out, if you didn’t get the 32bit version, just click on the 8-bit link)
If you have the 32bit controller, click here for software installation, the instructions below should work for the driver and instead of downloading the 8bit software, go and download the latest 32bit version, it is very intuitive.
You will need the USB driver, which you can download it here.
NOTE 2: I am using the Firmware version 2.3b5 and GUI is the 2.3b4 version.
NOTE 3: I’ve been told and read at several forums that the 2.4 version is not stable, and many had problem with YAW’s fine tuning. NOTE 4: I recommend using a PC and NOT a Mac, there are a lot of people having issue installing the driver/GUI using a mac, and the process is a bit tricky, if you need more information, you will need to visit this link.
NOTE 5: If you hear a high pitch sound when first plug in the battery to the gimbal, that’s normal, you just have to go to the advance tab and under PWM frequency changed it to (HIGH (silent)).
NOTE 6: If you plug the battery to the gimbal and it shakes uncontrollable, do not panic, that is normal (as I’ve explained below), it is because the controller board on the gimbal do not know what to do yet, so you need to follow the tuning instruction below. You will need the PC driver installed, you can grab it here.
ALSO, please KEEP the camera on the gimbal while doing software tuning, without the camera it will move/jerk like crazy. A few users had expressed problem installing the driver and such, here’s a good video that would help:
You will also need the Java runtime installed if you don’t have it, as the SimpleBGC GUI is Java application. It can be downloaded here Here’s part of the FAQ from AerialPixels:
Q: GUI Connects, Alerts “GUI Version Mismatch” but flashing through the GUI does not work.
A: You can try XLOADER to flash the firmware and the links to download can be found above.
Q: OK I selected the COM port in XLOADER, selected the firmware file and started to flash. After a few seconds XLOADER came back and said “failed”
A: Not to worry, its normal. Close XLOADER application, open the GUI and try to connect. You can also keep a track of what’s happening while flashing by looking at the LED lights of the controller. Moment the board goes into FLASH mode, the GREEN LED will go off and the RED LED will be constantly lit. After the flashing is done (when XLOADER states it FAILED) the GREEN LED will start to blink. Now would be a good time to connect the GUI. Connect the gimbal battery to the gimbal FIRST before plugging the usb cable from gimbal to the PC. If you didn’t hear beeps when you plug the power onto the gimbal (whether via the batter or usb port, that may mean your IMU Sensor wiring is wrong). here’s a new video about GUI and a quick tuning explained (this is old but good reference point):
Here’s a good PID explanation to get you started, thank Timo:
I watched this video to give myself an idea:
Once connected, first thing I did was to update the firmware of mine to 2.3 which I had to use xloader (you will get an error at end of the update but it should be fine when you connect it via GUI). – Instruction on how to update firmware is at Alexmos’ site like above or google. When you get it all connected and you can see your gimbal via GUI, the first thing I did was to calibrate the accelerometer (the IMU sensor). I used this video as reference:
WHEN YOU HAVE THE GIMBAL PLUGGED TO THE COMPUTER and after ACC Calibration, your gimbal/motors will start vibrating or moving all other the places, DO NOT PANIC, this is because the gimbal is yet to be tuned and so the motors do not know what to do, you can do this: go and download Tom Antos’ or Emm (from Cheesycam.com)’s PID profiles and then put it on your desktop or under the folder of the GUI (there is a subfolder called Profiles), put it there, connect the gimbal to the GUI, load the profile and then WRITE. that will help ‘stop’ the vibrations or erradict behavior a bit. AND you can start FINE TUNE IT since the weight may not be the same for your camera than theirs.
Here’s another good tuning tutorial
NOTE 2: A lot of people do not pay attention on what’s been written here, you should READ THIS AT LEAST ONCE before starting to install/build/test/run/tune your gimbal, cause there are a lot of information here and a lot of videos that will make sense. Also DOWNLOAD the manual for your Alexmos controller board by going to the link provided earlier. IN THE MANUAL, it does talk about the different LED light means AND it tells you how to turn on the YAW (the 3rd Axis). So please read and download the manual and read the pages starting with Setup Up Step by Step. And yes, you are using the 8-bit board, since the 32bit just came out recently and unless CAME-TV tells you that you are getting a 32bit board, otherwise, it is an 8bit.
I went to Tom Antos’ website’s and read his review on the 3-Axis Brushless Gimbal article, and at end of his article, there is a link to his PID settings. Since Mr. Antos uses a 7D with 24mm lens that is about 3.233lbs or 1466.46g, so I tried his profile, it worked! (Click here for direct download link) So I downloaded Tom Antos’ profile setting and load it into profile 1 of my GUI and then write it to the controller. Unplugged it from the PC and tested, it worked! (It is set with follow mode).
8bit PID profiles: NOTE: I’ve seens moved to a 32bit controller, click here for the information
For those using a Canon 5D Mark II camera, Emm at CheesyCam.com also offered his profile for anyone interested. Emm’s total weight with the Sigma 20mm lens is 2.92574lbs or 1327.093341g. Maybe Emm’s profile works best for Canon 70D cameras. (Click here for direct download link)
JC Lensrental Coza was gracious enough to provide his PID Profile that you can click here to download. He uses Canon 70D with 16-35mm F2.8L lens (Total weight about 3.1lbs). Thanks JC Lensrental Coza! lensrental_70d_16-35_with_followyaw_pitch_roll_joystick (he uses Firmware 2.4b7)
Here’s our own MDIFILM profile for 8bit Alexmos Controller for you to try, it is set to be used with a Canon 70D with Rokinon 14mm lens (about 2.86lbs), this same setting has worked for my Gh4 with Generic Speedbooster adapter and the Rokinon 14mm lens, and I’ve adjusted the PID and Power information to make it ‘a bit more stable’ for my configuration. Click here to download our profile.
An user (Spyder03) at Multikopter’s forum created a google document that encourages everyone to post their PID informaiton to share with the public, this may be of an interest to you. Click here for the spreadsheet.
On Facebook’s Brushless Gimbal group, user Stefano Mnuar Foppoli offered his 8bit controller pid profile, it is for his Canon 7D with 24-105mm lens. Click here to download.
(My camera OLD Camera is the Canon 70D + Rokinon 14mm lens = total weight is 2.86669lbs or 1300.31g) Here are pictures of my settings (before I’ve created my own PID settings which you can download above) Now also works with the GH4+Generic Speedbooster+Rokinon 14mm lens. – for 8 Bit Controller only.

Above pic is the basic settings, depending on your camera+lens weight, the information on the left (ROLL/PITCH/YAW PID settings) may change, where as the information on the POWER/REVERT/NUM POLES can be set as it is on mine, especially the NUM POLES.

Picture above is the Advance page, which you can turn off the high pitch sound (when you reset your settings, you will then hear it), and to ACTIVATE the YAW board – where is said YAW Ext board.

This is the page to set up for the menu buttons that comes with your gimbal or if you decided to buy a joystick, here are the area to set it, each may be different, so search around to make the right information. As where this information derives from, on your controller board (on the back, you will see a square box area in the middle of the board that has something like FC_Roll, FC_Pitch, RX_Roll, RX_Pitch… trace that to the connectors, that’s where you will be plugging joytstick/menu buttons that I talked about below). Also, you may need to solder the BTN holes on the right low corner. That is to allow you to be able to use a switch to switch between profiles, so you can have a profile set to follow mode, a profile set to not follow, a profile to set to calibrate, etc.

Pic above is what I am talking about setting the buttons options to do several things.

Pic above is to set the follow mode.
AGAIN, all these information is available on the Alexmos manual plus the videos I have above. and REMEMBER to click on WRITE so it can writer the information to the controller board or everytime you turn it off, the info will be lost.
==================
PID settings can be hard, especially it changes based on your camera+lens weight, the battery you use, the motors you have and such, so it may take forever to find the right settings, I will try my best to compile as many profiles as I can find available, at least there are two above here, also here are additional links of users sharing their PID settings information:
http://www.rcgroups.com/forums/showthread.php?t=1907664 http://diydrones.com/profiles/blogs/alexmos-brushless-gimbal-pid-settings-share-them-with-the
http://www.tppacks.com/store/download/AlexMos_Gimbal_Controller_Tuning_Guide.pdf (PDF file)
http://www.dronetrest.com/t/how-to-connect-and-setup-alexmos-3-axis-brushless-gimbal-controller/53/5
http://www.lumenier.com/products/multirotors/qav540g/tuning-guide
NOTE: Make sure to scroll through the comments for additional information and other stuff that Tom and I have been posting. You can do additional tuning of your controller and set the exact right PID information, unfortunately no matter how many videos I watched, I just couldn’t figure out, so I gave up. At least, at this point, I got a fairly decent running gimbal set and can keep testing from there on. And can also reset back to default and reload Mr. Antos’ PID profile. Here’s another video about tuning PID settings.
Or this video:
Connecting other items (Menu buttons, Joystick, Profile Button) for 8 Bit Controllers.
For those interested in connecting the menu buttons that comes with Came-7000, check out Came-TV’s facebook page under one of the customer’s questions. Here’s a picture of what your board on the back look like and what are the different pins for Or see below:


and PID setting info:


Came-TV’s facebook page is another great place for asking questions, not only Came-TV staff are of great help, their customers as well! NOTE: I believed Tom’s PID profile already have this set with the GUI, so you can just connect the wires and go out and play. You can get a joystick/switch to control the lens and to switch between profiles so you can have one set for follow mode, the other to use with the joystick or a profile to run the gimbal upside down like what Besteady can do 🙂
Added Protections (8bit controllers only, as the 32bit versions comes with a protection box already): I added a enclosure for my controller so it doesn’t hit anything, it fits well and I didn’t use the I/O switch, I got lazy. Also, I had to add a separation between the controller board and the back of the enclosure so it doesn’t touch, it seems that when it touches, it would short out. Emm of Cheesycam.com also suggested using a project box. I have both information below.
That’s it! I hope these are helpful, and if you need other supports, here are some recommended links:
For anyone need help, check out this great Facebook Group.
http://www.multikopter.co.uk/forum/forum/86-3-axis-gimbal/ https://www.facebook.com/groups/TBCGG/
https://www.facebook.com/groups/162469577283791/
http://www.rcgroups.com/forums/showthread.php?t=2035107&page=2
http://www.unmannedtech.co.uk/3/post/2013/12/balancing-your-brushless-gimbal.html
http://www.foxtechfpv.com/product/falcongimbal/FOXTECH%20FALCON%20BRUSHLESS%20GIMBAL%20OPERATION%20MANUAL.pdf http://jodagimbal.com/?paged=3
http://www.dronetrest.com/t/balancing-your-brushless-gimbal/55/2
Add additional accessories for your gimbal, here are a few links where I buy stuff at 🙂
 (July 7, 2014), now that I am using the Panasonic GH4 with my Gimbal, I have been searching for an extra thin wire that can connect the camera to an external monitor (in this case the Neewer DC-50 that I have listed below), finally, this cable works, perfect length for what I needed for. Click here to find out more (this is Micro-HDMI to HDMI), if you need Mini-HDMI to HDMI – like Canon or other DSLRs, it’s a bit short but works, click here.
If you live in the USA, you can buy parts for your gimbal here (I got a stand with them, a joystick with button to control profiles, a monitor tray): http://www.aerialpixels.com


NOTE: Came-TV.com also now have Gimbal stand available for sale, you can probably find cheaper ones via aliexpress.com as well (many RC hobbyist buys from this site from all the forums I’ve read)
For other accessories, I shop via Amazon (as I have Prime) 🙂 – I use http://smile.amazon.com as it will allow you to give some $ back to charity of your choice.
For a basic controller enclosure, I’ve gotten this (if you use the basic shipping it will get to you in 20 days or so, also I didn’t use the swith, I was lazy): http://www.aliexpress.com/snapshot/6031343305.html to avoid shorting out the controller board with the box (it seems to pass through electricities), I used a 3M double sided tape. I’ve seen pictures of people using plastic screws 
click below picture to enlarge to see those plastic screws. Just found them on ebay, they are plastic m2.5x8mm screws (or you can use m2.5x10mm) and the plastic m2.5 nuts.


Emm of Cheesycam.com also did a video on using a project box to cover up the controller, check it out!
If the Gimbal gets heavy and you need something to support it (like a Stabilizer vest), you can either spend for about $2k for an EasyRig or a ReadyRic, or you can consider this: The Atlas Camera Support System. http://www.atlascamerasupport.com/


Came-7000 with the Atlas Camera Support System
You may add this to the support system so you can easily attach/detaache from the gimbal. A cube Pelican 0340 or 0350 (2″ wider all around) case that can fit the gimbal straight down: http://smile.amazon.com/gp/product/B004AICE5C/ref=oh_details_o02_s00_i00?ie=UTF8&psc=1

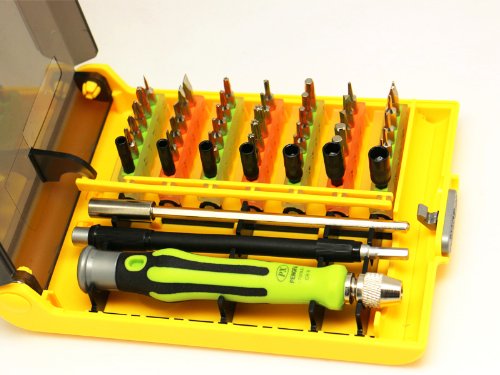
45 in 1 Precision Screwdriver Tools set for RC PC Mobile Car, I use this for my gimbal. http://smile.amazon.com/gp/product/B00A740VQM/ref=wms_ohs_product?ie=UTF8&psc=1
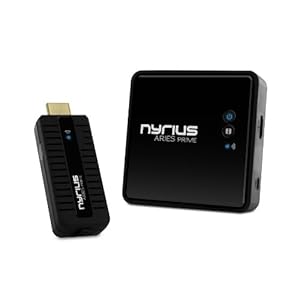
Want to do wireless hdmi out monitoring? Try this: http://smile.amazon.com/gp/product/B009E6R89C/ref=wms_ohs_product?ie=UTF8&psc=1 and you will need a battery backpack for the wireless transmitter: http://smile.amazon.com/gp/product/B009USAJCC/ref=wms_ohs_product?ie=UTF8&psc=1 NOTE: with the Panasonic GH4, you just need a quad core android tablet or an Ipad Air and you are set to go, since the camera can connect via wifi and with the Panasonic Image App, you can actually control everything via the tablet. Great and easy way to do remote control 🙂

Need a 5” monitor with video out loop? Either SmallHD DP4 (about $500), or MustHD (about $205) http://www.musthd.com/products/5-inch-musthd-lcd-hdmi-field-monitor-with-focus-assist-marker-false-color-41.html 
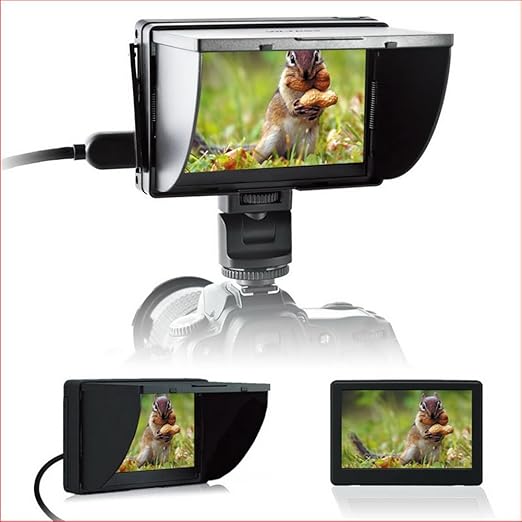
Need cheaper 5” monitor with focus peaking? (smaller than the 5″ monitors mentioned above, but it may take up to 20 days to get it as they need to ship it from China) $122 though and no hdmi out (only HDMI in) http://smile.amazon.com/gp/product/B00GJK57V2/ref=oh_details_o00_s00_i00?ie=UTF8&psc=1
To connect the monitor to the DSLR, you may need a cable that is about 3ft long, after a while of searching, I finally found one that has the 90degrees angle turn the right way (upside for Canon DSLRs at least), http://www.ebay.com/itm/260984380154?ssPageName=STRK:MEWNX:IT&_trksid=p3984.m1439.l2649 or you can use the ribbon one I have posted above for the Gh4 to the Monitor.
I didn’t go with curly cables because they usually may restrict the gimbal to move. Wanna have wireless control to an Android phone or tablet? http://www.dslrfilmnoob.com/2013/12/11/tp-link-tl-mr3040-wireless-field-monitor-dslr-controller/
Another monitor or mic holder: http://smile.amazon.com/gp/product/B00585CLVS/ref=oh_details_o03_s00_i00?ie=UTF8&psc=1 (this is what I am using right now, it’s ok, I am looking for something that I can move around a bit more to adjust monitor view.
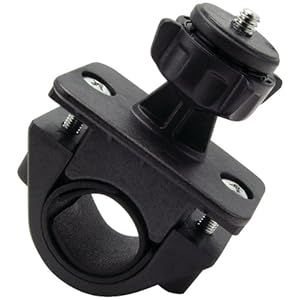
some people uses this one too: CARBON FIBER MONITOR FIXING BRACKET

Need another 3s 11v battery? Consider this: http://smile.amazon.com/gp/product/B00FMYY2OE/ref=wms_ohs_product?ie=UTF8&psc=1

You may need a few velcro straps to attach the battery to the gimbal, either this one or this one will work.
NEED MORE HELP OR RESOURCES? USE GOOGLE SEARCH or FEEL FREE TO CONTACT ME via EMAIL (It’s much easier) Also, some issues may need you to videotape the problem so it can be easier to explain.
Here are some pictures of my Came-7000 3-Axis Brushless Gimbal Stabilizer System for DSLR (up to 6.6lbs)


For more pictures of my Came-7000, click here.
I wanted to give a shout out thanks to the following: Frank from Came-TV, Emm from Cheesycam.com, Tom Antos from TOmAntosFilms.com, Deejay from DSLRFilmnoob.com, Caleb from DSLRvideoshooter.com, Mike Bacanu, Jason Wang, Joe Insana, Michael from Atlas Camera Support System, and the Dragon Dance costume.
Sorry, the comment form is closed at this time.